 |
|||||||||||||
| News | Tutorials | Games | Downloads | Links | Contact | ||||||||
 |
 |
|
 |
||||||
Featured Author: -blendenzo-
|
Tutorials - Blender Game Engine
Vertex Parentingby blendenzoDownload the base .blend file (101kb) used in this tutorial to follow along with the examples. Preface: Situations often arise in game design where one object needs to follow another object's movements. This is easily accomplished in the Blender Game Engine by simply parenting [Ctrl+P] the second object to the first. The child object will mimic all of the movements made by its parent. The child duplicates rotations as well, though, which can sometimes be undesired. When the child should only mimic movements, but not rotations, vertex parenting is the best solution. Vertex parenting is especially useful for creating 2D side-scroller camera setups and for causing skies to seem distant. While there are certainly other applications, this tutorial will illustrate these two, since they are very common. Setting up a 2D side-scroller camera: If you haven't done so already, download the base .blend that I've set up for this tutorial. Make sure you are in the scene called "SideScroll". From camera view [NumPad 0], press [P] to see the game as it is currently set up. Left, Right, and Space control the ball, but the camera does not follow the ball, so it sometimes goes off screen. Let's fix that. Select the camera, then [Shift+Select]the ball so that both are selected at the same time. The last object to be selected (in this case the ball) is termed the active object. Press [Ctrl+P] and select "Make Parent" from the popup menu. 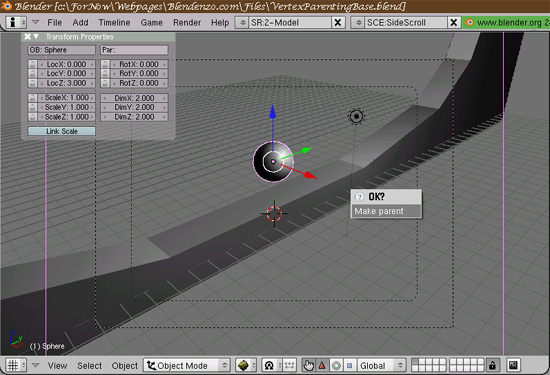 If you press [P] now, you will see why simple parenting doesn't work in this situation. The camera follows the ball's movement, but since the ball is set to Actor >> Dynamic >> Rigid Body, it rolls, and the camera rolls right along with it. The result is quite dizzying. Select the camera and press [Alt+P] to clear the parenting. 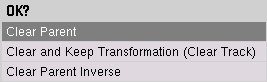 Vertex parenting can be set up in 6 simple steps:
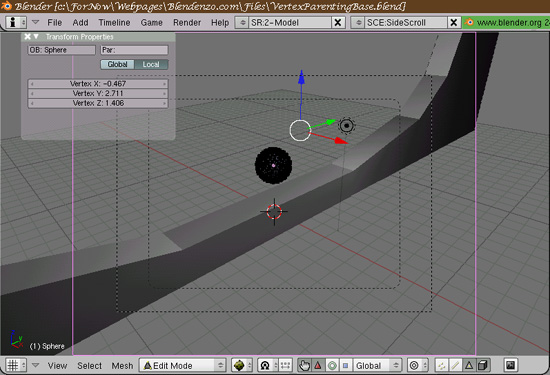  Now change all of the coordinates in the Transform Properties box to "0". (You can bring
up or hide the Transform Properties box at any time by pressing [N].) Be sure that
the "Local" button is selected (see below). This will move the new vertex to the object
center. (Note: The vertex parent must be at the object center or the camera will not be where
you expect it to be in the game.)
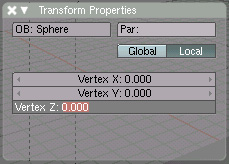
Now change all of the coordinates in the Transform Properties box to "0". (You can bring
up or hide the Transform Properties box at any time by pressing [N].) Be sure that
the "Local" button is selected (see below). This will move the new vertex to the object
center. (Note: The vertex parent must be at the object center or the camera will not be where
you expect it to be in the game.)Press [Ctrl+P] over the 3D viewport and select "Make Vertex Parent". 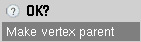 Press [Tab] to return to Object Mode, and press [P] to play the game (remember, left, right, and space to control the ball). It's a lot more fun now, and there are a couple of hidden features. (You can stick to the ceiling?!) Creating the perception of a distant sky: Switch scenes to "DistantSky" now. Press [P] and roll the ball around (arrow keys to move and space to jump). Notice how the skybox just sits there? As you get closer to it, it's obvious that it is only a box around the plane you're rolling on. Use the process from the last example to make the ball the vertex parent of the sky. (Hint: When you enter edit mode on the ball, the vertex I used to parent the camera to the ball should be selected. As long as you don't change anything, you can skip the "make a new vertex" step and use that same vertex to parent the sky to the ball.) Press [P] again and notice the difference. The sky is "distant", or so it seems. Since the skybox moves with the ball, you never actually get any closer to it than when you started. This is the same method that I used in my "Shoot the Moon" entry for the Blender Barrage community minigame project. Anyway, enjoy. -blendenzo Back to the tutorials index... |
|||||
|
|
||||||
|
||||||
Website design by Tony "blendenzo" DiRienzo. All content © Copyright Tony DiRienzo unless otherwise noted.